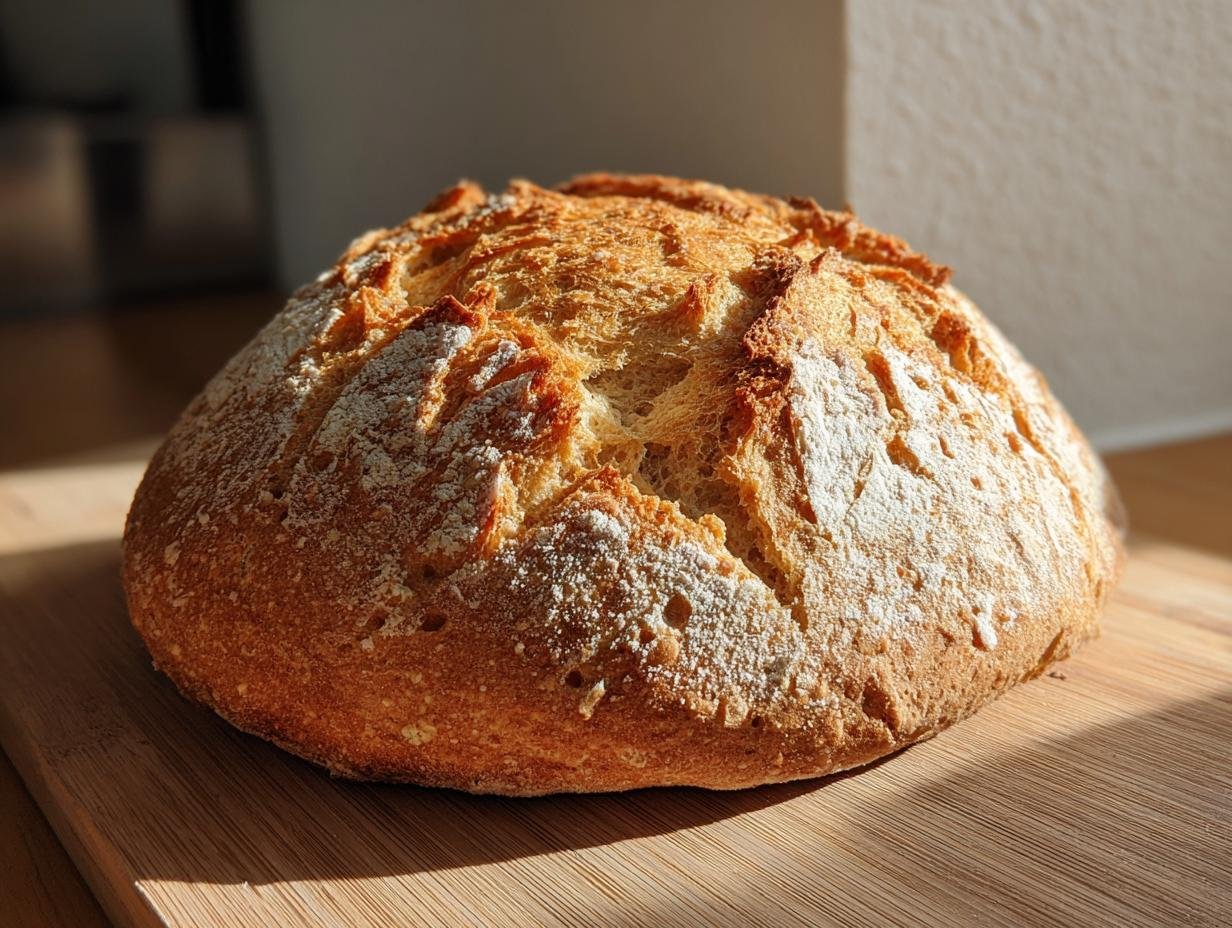
Let me tell you about my latest kitchen obsession – high-protein spelt flour! This ancient grain packs a serious nutritional punch while keeping things deliciously simple. I stumbled onto spelt flour during my quest for healthier bread options that wouldn’t sacrifice texture or flavor. Unlike regular wheat flour, spelt’s higher protein content gives your dough better structure while keeping it wonderfully tender. The first time I baked with it, I was shocked by how easily it came together – no fancy techniques needed! Now it’s my go-to for quick, protein-packed meals that actually satisfy.
Ingredients for High Protein Spelt Flour Bread
Here’s everything you’ll need to make this simple yet satisfying bread. I’ve tested these proportions dozens of times – they’re just right for that perfect balance of chew and tenderness. Trust me, you probably have most of these in your pantry already!
- 1 cup high-protein spelt flour (the star of the show!)
- 1/2 cup warm water (not hot – think baby bath temperature)
- 1 tbsp good olive oil (the fruity kind works wonders here)
- 1/4 tsp fine sea salt (don’t skip this flavor booster)
- 1 egg (optional, but gives extra protein and binding power)
See? Nothing fancy – just honest ingredients that work together beautifully. Now let’s get mixing!
How to Make High Protein Spelt Flour Bread
Okay, let’s dive into the fun part – turning these simple ingredients into something magical! I promise it’s easier than you think. Just follow these steps, and you’ll have fresh, protein-packed bread in no time.
Mixing the Dough
First, grab your biggest mixing bowl – trust me, you’ll want the extra space. Dump in your spelt flour and salt, giving them a quick whisk to combine. Now, here’s my secret: warm (not hot!) water makes all the difference. Pour it in slowly while stirring with your other hand. The dough should come together into a shaggy mass – don’t panic if it looks messy at first!
Kneading and Resting
Flour your hands and turn the dough onto a clean surface. Now comes the therapeutic part – kneading! Push the dough away with the heel of your hand, fold it back, rotate, and repeat. After about 5 minutes, you’ll feel it transform from sticky to smooth and elastic. Pop it back in the bowl, cover with a damp towel, and let it rest for 30 minutes. This rest period lets the gluten relax – crucial for that perfect texture!
Shaping and Cooking
After its nap, your dough will be ready to play! Divide it into portions if you like, or keep it whole for one big flatbread. Roll it out to about 1/4 inch thickness – no need to be perfect here. Heat your pan over medium until a drop of water sizzles, then cook each side for 2-3 minutes until golden with those gorgeous brown spots. You’ll know it’s done when it puffs up slightly and smells like heaven!
Why You’ll Love This High Protein Spelt Flour Bread
This isn’t just another bread recipe – it’s a game changer! Here’s why it’s become my kitchen staple:
- Protein power without the chalky taste: Spelt flour packs 6g of protein per serving, but unlike some healthy breads, it actually tastes good! The natural sweetness balances perfectly with savory toppings.
- So simple even my kids can make it: No yeast, no complicated steps – just mix, knead, and cook. I’ve literally made this while helping with homework!
- Versatile as your favorite jeans: Flatbreads, pizza crust, sandwich wraps – this dough does it all. My favorite? Tearing off warm pieces to scoop up hummus!
- Gentler on sensitive tummies: Many friends who struggle with regular wheat find spelt easier to digest. (Though it’s not gluten-free, so celiac friends should still avoid it.)
Once you try it, you’ll understand why I make a batch every Sunday – it’s that good!
Tips for Perfect High Protein Spelt Flour Bread
After making this bread more times than I can count, I’ve picked up some tricks that’ll save you from my early mistakes. Here’s what I wish someone had told me when I first started:
Getting the water just right
The temperature and amount of water make all the difference! I keep a thermometer handy – aim for 100-110°F (like warm bath water). Too hot kills the dough’s elasticity, too cold makes it sluggish. If your dough feels too sticky, add flour 1 tbsp at a time. Too dry? Sprinkle water on your hands while kneading instead of dumping more in the bowl.
The kneading sweet spot
Set a timer for 5 minutes – no cheating! Under-kneaded dough tears easily and won’t hold its shape. Over-kneaded? It becomes tough. You’ll know it’s ready when it passes the “windowpane test” – stretch a small piece between your fingers. If you can see light through it without tearing, you’re golden!
Storage hacks that keep it fresh
This bread stays fresh wrapped in a clean kitchen towel for 2 days. For longer storage, I slice and freeze between parchment paper – pop a slice straight in the toaster! Pro tip: Revive day-old bread by spritzing with water and heating in a dry pan for 30 seconds per side. It’ll taste freshly made!
Remember – spelt flour behaves differently than regular wheat, so don’t stress if your first batch isn’t perfect. My early attempts looked more like abstract art than bread! With these tips, you’ll nail it faster than I did.
Fun Ways to Mix Up Your High Protein Spelt Flour Bread
Once you’ve mastered the basic recipe (which, honestly, is perfect as-is), it’s time to play with flavors! Here are my favorite easy tweaks that make each batch feel new:
Seeds for crunch and nutrition
My current obsession? Toasting sunflower seeds and folding them into the dough before resting. The nutty crunch is unreal! Sesame seeds (black or white) add gorgeous visual appeal and a subtle earthiness. For a mega-nutrition boost, try chia or flaxseeds – just soak them in the recipe’s water for 10 minutes first to soften.
Herbs that transform the flavor
Fresh rosemary makes this bread taste like it came from a Tuscan bakery. Just chop it fine and knead it in. Dried oregano with a pinch of garlic powder creates instant pizza crust vibes. And for something surprising, try za’atar – this Middle Eastern spice blend makes your bread irresistible dipped in olive oil.
Sweet versions for breakfast
Swap the salt for a tablespoon of honey or maple syrup, then stir in cinnamon and raisins. Roll it out thicker and cook slower for a protein-packed “pancake” that keeps me full till lunch. Top with almond butter and banana slices – trust me, it’s life-changing!
The best part? These variations don’t change the basic method at all. Just pick your add-ins and follow the same simple steps. Next time you’re feeling adventurous, give one a try – you might discover your new favorite!
Serving Suggestions
Now for my favorite part – loading up this wholesome bread with delicious toppings! Here are the ways my family enjoys it most:
For soups and stews
Nothing beats tearing off warm pieces to dunk into a steaming bowl of tomato soup or lentil stew. The bread soaks up flavors beautifully without falling apart. On chilly nights, I’ll make mini bread bowls by shaping the dough into small rounds before cooking – perfect for creamy butternut squash soup!
With Mediterranean dips
Slice it into wedges for the ultimate hummus delivery system! It also pairs amazingly with baba ganoush, tzatziki, or my quick whipped feta dip (just blend feta, Greek yogurt, and lemon). Add some olives and sliced veggies, and you’ve got an instant mezze platter that feels fancy but takes minutes.
As sandwich wraps
Roll it out thinner for pliable flatbreads that hold fillings without cracking. My go-to lunch? Smashed chickpeas with avocado, sprouts, and a drizzle of tahini. For heartier appetites, grilled chicken with roasted red peppers and pesto never disappoints. Bonus: these wraps don’t get soggy like regular bread, so they’re perfect for packed lunches!
Really though, this bread is so good I often eat it plain while it’s still warm from the pan. When something’s this tasty and wholesome, sometimes simple is best!
Storage and Reheating
Okay, let’s talk about keeping your spelt bread fresh – because let’s be honest, the hardest part is not eating it all in one sitting! Here’s how I store mine to keep that perfect texture:
Room temp for short-term: Wrap cooled bread in a clean kitchen towel or beeswax wrap. It’ll stay fresh for about 2 days this way – if you can resist it that long! The towel prevents condensation that makes bread soggy, unlike plastic bags.
Freezing like a pro: For longer storage, I slice it before freezing (trust me, trying to slice frozen bread is a workout no one needs!). Layer slices between parchment paper in a freezer bag. They’ll keep for up to 3 months, and you can grab just what you need.
Reheating magic: My favorite trick? Spritz frozen slices lightly with water and pop them straight into a toaster or dry pan. The steam brings them back to life! For whole loaves, wrap in foil and warm at 300°F for 10 minutes. It’ll taste freshly baked – crust slightly crisp, interior perfectly tender.
One warning – the smell of reheating spelt bread is dangerously delicious. I may or may not have burned my fingers more than once from impatience!
Nutritional Information
Let’s talk numbers – but don’t worry, these are the good kind! Here’s what you’re getting in each serving of this powerhouse bread (based on my recipe testing and favorite nutrition calculator):
- Calories: About 120 per slice – perfect for a satisfying snack or meal base
- Protein: 6g (that’s more than an egg!) from the spelt flour and optional egg
- Fiber: 3g to keep you feeling full longer
- Healthy fats: Just 3g total, mostly from the olive oil’s good monounsaturated fats
- Carbs: 20g of the complex, slow-digesting kind
A quick heads up – these values can vary slightly depending on your exact ingredients and portion sizes. I’ve found different brands of spelt flour can have small protein differences, and whether you add the egg changes things too. But no matter how you slice it (pun intended!), this bread delivers way more nutrition than your average white loaf.
What I love most? Unlike store-bought “protein breads” loaded with additives, this gives you clean energy from real ingredients you can actually pronounce. My fitness buddy calls it “nature’s protein bar” – and I have to agree!
Common Questions About High Protein Spelt Flour Bread
I get asked about this bread all the time – here are the questions that pop up most often in my kitchen (and my honest answers after years of making it):
“Can I substitute regular flour for spelt flour?”
Technically yes, but you’ll lose that special nutty flavor and protein boost! Spelt has more gluten than whole wheat but less than all-purpose flour, so the texture changes. If you must substitute, try half whole wheat and half all-purpose – but really, give spelt a chance first. Once you taste the difference, you might not go back!
“Is this bread gluten-free?”
Nope, and that’s important to know! Spelt does contain gluten, though many find it gentler than modern wheat. My friend with mild gluten sensitivity tolerates it fine, but celiac friends should avoid it. Always check with your doctor if you’re unsure!
“Why does my dough seem stickier than yours?”
Ah, the great spelt mystery! This flour absorbs liquid differently depending on humidity and brand. My trick? Start with slightly less water than the recipe calls for, then add more as needed. If it’s already too sticky, don’t panic – just flour your hands well and keep kneading. It’ll come together, I promise!
“Can I make this without the egg?”
Absolutely! The egg adds protein and helps bind, but the bread still works without it. Just add an extra tablespoon of water if the dough feels too dry. My vegan friends love it this way – especially with a flax “egg” (1 tbsp ground flax + 3 tbsp water) for extra nutrition.
“How do I know when it’s cooked through?”
Look for golden spots on both sides and listen for a hollow sound when you tap the bottom. If you’re unsure, break open a test piece – the inside should look evenly cooked with no doughy streaks. Undercooked spelt bread can taste gummy, so when in doubt, give it another minute!
Got more questions? Drop them in the comments – I love geeking out about this stuff! No question is too silly (trust me, I’ve asked them all myself at some point).
Ready to Bake Your Own High-Protein Spelt Bread?
Now that you’ve got all my best tips and tricks, it’s your turn to experience the magic of this simple, wholesome bread! I can’t wait for you to smell that nutty aroma filling your kitchen and taste that first warm, satisfying bite. Remember – your first batch might not be perfect (mine certainly wasn’t!), but that’s part of the fun.
When you make it, tag me on Instagram or leave a comment below – I’d love to hear how it turns out and what creative twists you try. Did you add herbs? Make it into pizza? Discover an amazing new topping combo? Share your wins (and even your funny kitchen fails) so we can all learn together!
Happy baking, friends – may your spelt bread be fluffy, your toppings plentiful, and your kitchen adventures delicious!
Print
5-Ingredient High Protein Spelt Flour Bread That Satisfies
- Prep Time: 10 mins
- Cook Time: 10 mins
- Total Time: 50 mins
- Yield: 4 servings 1x
- Category: Bread
- Method: Pan-fried
- Cuisine: International
- Diet: Vegetarian
Description
A nutritious recipe using high-protein spelt flour for a healthy, protein-packed meal.
Ingredients
- 1 cup high-protein spelt flour
- 1/2 cup water
- 1 tbsp olive oil
- 1/4 tsp salt
- 1 egg (optional for binding)
Instructions
- Mix spelt flour, salt, and water in a bowl.
- Add olive oil and egg (if using).
- Knead the dough for 5 minutes until smooth.
- Cover and rest for 30 minutes.
- Roll out the dough and shape as desired.
- Cook on a hot pan for 2-3 minutes per side.
Notes
- Use warm water for easier mixing.
- Adjust water if the dough is too dry or sticky.
- Store leftovers in an airtight container.
Nutrition
- Serving Size: 1 slice
- Calories: 120
- Sugar: 1g
- Sodium: 100mg
- Fat: 3g
- Saturated Fat: 0.5g
- Unsaturated Fat: 2g
- Trans Fat: 0g
- Carbohydrates: 20g
- Fiber: 3g
- Protein: 6g
- Cholesterol: 20mg