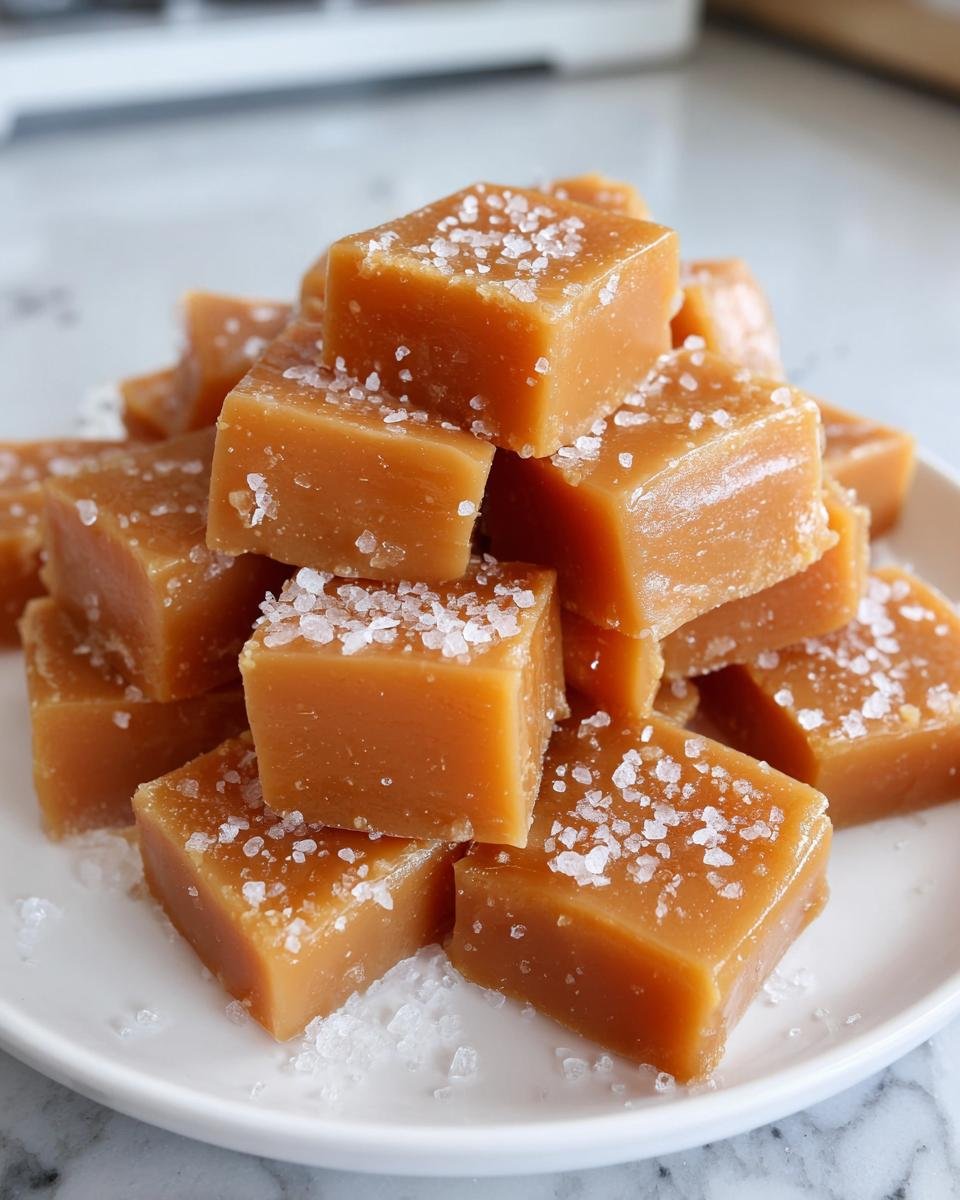
There’s something magical about pulling a batch of homemade salted vanilla caramels off the stove—that moment when the sweet, buttery scent fills your kitchen and you know you’re about to taste something extraordinary. I still remember the first time I made these; I burned my finger testing the sugar syrup (ouch!), but one bite of that creamy, vanilla-kissed caramel made it all worth it. These little squares of joy strike the perfect balance between rich sweetness and that addictive salty crunch. And the best part? They come together with just a few basic ingredients and about 30 minutes of your time. Trust me, once you try homemade, you’ll never go back to store-bought caramels again.
Why You’ll Love These Salted Vanilla Caramels
Let me tell you why these salted vanilla caramels have become my go-to treat (and why they disappear faster than I can make them):
- Creamy dreamy texture – That perfect chew? It comes from cooking the sugar just right. Not too soft, not too hard – like biting into a little square of buttery heaven.
- The sweet-salty magic – The moment that flaky sea salt hits your tongue with the rich vanilla caramel? Absolute perfection. It’s that addictive contrast that keeps you reaching for “just one more.”
- Surprisingly simple – Don’t let the fancy name fool you. With just a saucepan and a few pantry staples, you’re 30 minutes away from homemade candy that’ll impress everyone.
- Gift goldmine – Tuck these into pretty boxes or jars, and suddenly you’re the most popular person at the holiday party. I’ve lost count of how many friends now request these instead of store-bought chocolates!
Seriously, these little squares of joy check all the boxes – delicious, easy, and downright giftable. What’s not to love?
Ingredients for Salted Vanilla Caramels
Here’s what you’ll need to make these irresistible salted vanilla caramels:
- 1 cup granulated sugar – The base of your caramel. It’s what gives it that rich, golden color.
- 1/4 cup light corn syrup – Keeps the sugar from crystallizing, so your caramels stay smooth.
- 1/4 cup water – Helps dissolve the sugar evenly.
- 1/2 cup heavy cream – Adds that creamy, luxurious texture. Don’t skimp here!
- 6 tbsp unsalted butter, cubed – Use cold butter for easier mixing and that rich, buttery flavor.
- 1 tsp vanilla extract – The secret to that warm, aromatic finish.
- 1/2 tsp flaky sea salt – Half goes into the caramel, and the rest gets sprinkled on top for that perfect salty crunch.
Trust me, these ingredients come together to create something truly magical. Let’s get cooking!
Essential Equipment
Before we dive into making these salted vanilla caramels, let’s talk tools. You probably have most of these already, but a few key items will make all the difference:
- Heavy-bottomed saucepan – The thick base prevents hot spots and burning, which is crucial when working with sugar.
- Candy thermometer – Non-negotiable! Getting to that perfect 245°F is what gives caramels their ideal chewy texture.
- Parchment paper – For lining your pan so those sticky little squares pop right out.
- Wooden spoon or heatproof spatula – Metal conducts heat too much, and plastic might melt. Safety first!
One more thing—keep oven mitts and a bowl of ice water nearby. Hot sugar is no joke, friends. A splash on your skin will have you dancing around the kitchen (trust me, I’ve been there).
How to Make Salted Vanilla Caramels
Alright, let’s dive into the fun part – turning those simple ingredients into melt-in-your-mouth salted vanilla caramels. I’ll walk you through each step, sharing all my hard-earned tricks along the way. Just promise me you’ll be careful with that hot sugar – it’s sneaky stuff!
Preparing the Pan and Sugar Mixture
First things first – line that 8×8-inch pan with parchment paper, leaving some overhang on the sides. This little step saves so much frustration later when you’re trying to lift out the caramel slab. Now, grab your heavy-bottomed saucepan and combine the sugar, corn syrup, and water. Here’s the key – stir just until the sugar dissolves, then stop stirring completely once it comes to a boil. I know it’s tempting to keep mixing, but trust me, stirring now can cause crystallization and ruin your smooth caramel texture.
Cooking to the Perfect Temperature
This is where your candy thermometer becomes your best friend. Let the sugar mixture bubble away until it turns a beautiful amber color – about 10 minutes. Now comes the exciting (and slightly scary) part – carefully whisk in the cream and butter. Stand back! It’ll bubble up like crazy. Once things calm down, return it to medium heat and cook until your thermometer hits 245°F (that’s the firm ball stage for you candy nerds). This temperature gives you that perfect chewy-but-not-sticky texture we’re after.
Finishing and Cooling
Remove the pan from heat and stir in the vanilla and half your sea salt – that first whiff of vanilla is pure heaven. Pour it into your prepared pan, sprinkle the remaining salt on top, and now comes the hardest part… waiting. Let it cool completely at room temperature – at least 2 hours, though I often cheat and pop it in the fridge for 30 minutes if I’m impatient. Once it’s firm, use the parchment handles to lift it out and cut into squares with a sharp knife. Pro tip: Lightly oil your knife to prevent sticking!
Tips for Perfect Salted Vanilla Caramels
After making more batches of these caramels than I can count (and yes, some spectacular failures too), here are my tried-and-true tips for caramel success:
- Don’t swap the corn syrup – I know some recipes say you can use honey or maple syrup, but corn syrup really is best for preventing crystallization. Just 1/4 cup gives you perfectly smooth caramels every time.
- Medium heat is your friend – Cranking up the heat might seem faster, but it leads to burnt spots. Keep it at a steady medium for even cooking and that gorgeous amber color.
- Prep everything first – Measure all ingredients before starting because once the sugar starts cooking, you won’t have time to hunt for that vanilla extract.
- Test without a thermometer – No thermometer? Drop a bit of caramel in ice water – it should form a firm but pliable ball at 245°F. (But really, just get a thermometer.)
Follow these tips, and you’ll be a caramel-making pro in no time!
Storing and Serving Suggestions
These salted vanilla caramels keep beautifully in an airtight container at room temperature for up to 2 weeks – if they last that long! I like layering them between sheets of parchment paper so they don’t stick together. For gifting, wrap individual pieces in wax paper squares tied with twine – they look adorable in little mason jars or tins. My favorite way to enjoy them? With a strong cup of coffee in the afternoon or tucked into lunchboxes as a sweet surprise. They also make killer additions to dessert boards – just try not to eat them all while arranging!
Salted Vanilla Caramels Variations
Once you’ve mastered the basic recipe, try these fun twists to mix things up:
- Coffee kick – Stir in 1 tsp espresso powder with the vanilla for a mocha caramel that pairs perfectly with after-dinner coffee.
- Bourbon bliss – Swap half the vanilla for bourbon (about 1/2 tbsp) – just enough to add warmth without overpowering.
- Spiced surprise – Add a pinch of cinnamon or cardamom to the sugar mixture for a subtle autumnal flavor.
My personal favorite? The espresso version – it’s like a fancy coffee shop treat but made in your own kitchen!
Nutritional Information
Here’s the scoop on what’s in these delicious salted vanilla caramels (per piece). Keep in mind these are estimates – your exact numbers might vary depending on your ingredients:
- Calories: 60
- Sugar: 8g
- Fat: 3g
- Sodium: 35mg
Not bad for such an indulgent little treat! Remember, homemade means you control the quality of everything that goes in.
Frequently Asked Questions
Over the years, I’ve gotten all sorts of questions about these salted vanilla caramels. Here are the ones that pop up most often (along with my hard-earned answers):
Can I use honey instead of corn syrup?
I get why you’d ask – but honey’s a tricky substitute here. While it might work in a pinch, honey tends to make caramels softer and can overpower the vanilla flavor. Corn syrup really is the best for that perfect chewy texture. If you must substitute, try golden syrup – it behaves more similarly.
Why did my caramels turn grainy?
Oh no! This usually happens if sugar crystals form during cooking. Did you stir after the mixture started boiling? That’s a common culprit. Next time, just gently swirl the pan instead of stirring once it’s boiling. Also, make sure your saucepan is completely clean – even a tiny sugar crystal stuck to the side can cause crystallization.
How do I know if my thermometer is accurate?
Great question! Test it by placing it in boiling water – it should read 212°F at sea level. If it’s off, you’ll know to adjust (or replace it). I check mine every few months because nothing’s worse than caramels that turn into jawbreakers!
Can I double this recipe?
Absolutely! Just use a larger saucepan (at least 3 quarts) so the bubbling sugar has room to expand safely. The cooking time might increase slightly, so keep watching that thermometer. I often make a double batch around the holidays – they disappear fast!
Share Your Results
I’d love to see your salted vanilla caramel creations! Snap a pic of your perfectly cut squares (or let’s be real – that first bite mark) and tag me. Nothing makes me happier than seeing these little buttery wonders in your kitchens. Happy caramel-making, friends!
30-Minute Salted Vanilla Caramels That Taste Divine

Homemade salted vanilla caramels are rich, buttery, and perfectly balanced with a hint of sea salt. These easy-to-make treats are ideal for gifting or enjoying as a sweet indulgence.
- Prep Time: 10 mins
- Cook Time: 20 mins
- Total Time: 30 mins
- Yield: 36 caramels 1x
- Category: Candy
- Method: Stovetop
- Cuisine: American
- Diet: Vegetarian
Ingredients
- 1 cup granulated sugar
- 1/4 cup light corn syrup
- 1/4 cup water
- 1/2 cup heavy cream
- 6 tbsp unsalted butter, cubed
- 1 tsp vanilla extract
- 1/2 tsp flaky sea salt
Instructions
- Line an 8×8-inch baking pan with parchment paper.
- Combine sugar, corn syrup, and water in a medium saucepan over medium heat. Stir until sugar dissolves.
- Bring to a boil without stirring until the mixture turns amber (about 10 minutes).
- Remove from heat and carefully whisk in cream and butter (mixture will bubble).
- Return to heat and cook until a candy thermometer reads 245°F (firm ball stage).
- Remove from heat, stir in vanilla and 1/4 tsp salt.
- Pour into prepared pan, sprinkle remaining salt on top, and cool completely before cutting.
Notes
- Use a heavy-bottomed pan to prevent burning.
- Work carefully – hot sugar can cause severe burns.
- Store in an airtight container at room temperature for up to 2 weeks.
Nutrition
- Serving Size: 1 caramel
- Calories: 60
- Sugar: 8g
- Sodium: 35mg
- Fat: 3g
- Saturated Fat: 2g
- Unsaturated Fat: 1g
- Trans Fat: 0g
- Carbohydrates: 9g
- Fiber: 0g
- Protein: 0g
- Cholesterol: 10mg

