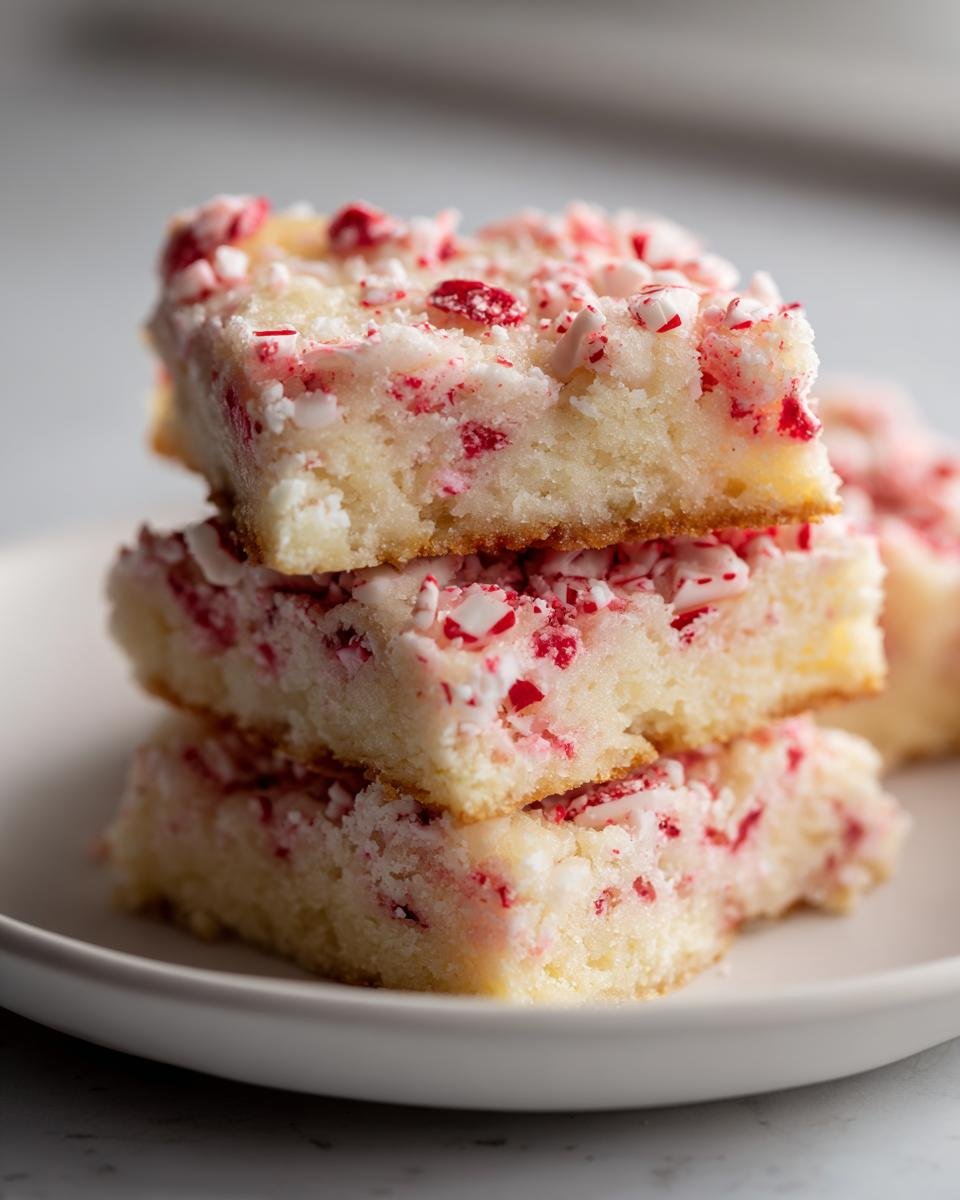
Nothing says holiday baking quite like the scent of peppermint wafting through the kitchen! These peppermint sugar cookie bars have been my go-to festive treat for years – they’re soft, chewy, and packed with that nostalgic minty flavor that makes December feel extra special. I remember my first time making them as a teenager, nervously crushing peppermint candies with a rolling pin, only to be amazed at how those little red-and-white flecks transformed ordinary cookie dough into something magical.
What makes these bars truly special is their perfect texture – not quite a cookie, not quite a cake, but this wonderful in-between that stays deliciously soft for days. They’re simpler than rolling out individual cookies but just as impressive when arranged on a holiday platter. Over the years, I’ve baked hundreds of batches for cookie swaps, teacher gifts, and those cozy nights when the Christmas lights are twinkling and we just need something sweet with our hot cocoa.
What I love most is how accessible they are – whether you’re a seasoned baker or just starting out, these peppermint sugar cookie bars come together so easily. That first bite always takes me right back to my childhood kitchen, where my mom would let me sneak tastes of the dough (don’t tell anyone!) while we listened to holiday music. Now it’s become my own tradition to make them every year with my kids, and I’m excited to share all my little tips and tricks with you.
Why You’ll Love These Peppermint Sugar Cookie Bars
Trust me, these aren’t just any holiday cookies – they’re the kind that disappear faster than you can say “Santa Claus!” Here’s why they’ve become my absolute must-bake every December:
- Quick & easy: No rolling pin needed! Just mix, spread, bake – done in under 30 minutes
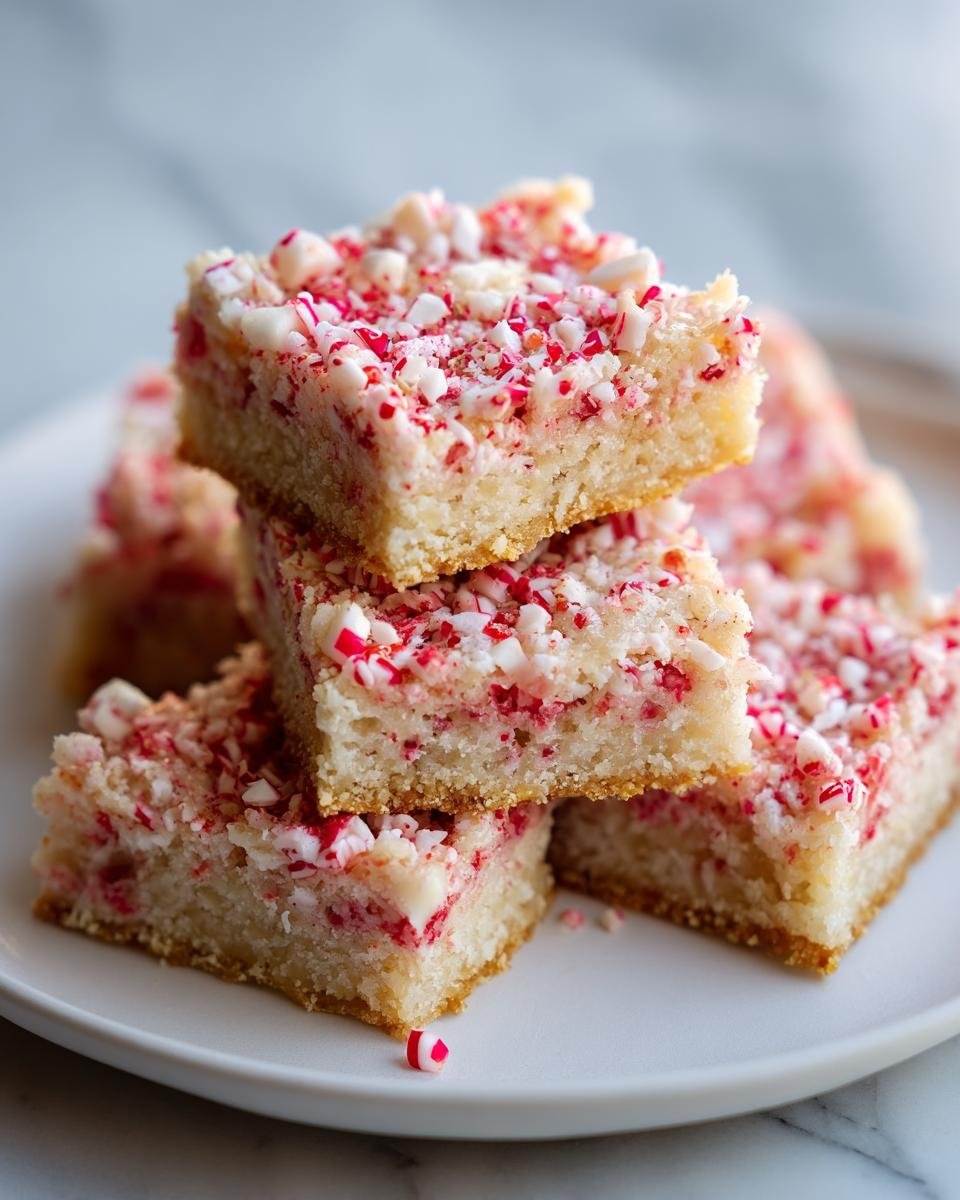
- That perfect texture: Chewy centers with slightly crisp edges that stay soft for days
- Festive flavor bomb: The peppermint makes them taste like Christmas in every bite
- Crowd-pleaser: Kids go crazy for them, and adults sneak seconds when no one’s looking
- Travels beautifully: Sturdy enough for cookie swaps and teacher gifts without crumbling
Seriously, the hardest part is waiting for them to cool before cutting – that minty aroma will drive you wild!
Ingredients for Peppermint Sugar Cookie Bars
Gathering your ingredients is the first step to cookie bar magic! Here’s everything you’ll need – and yes, that softened butter is non-negotiable (trust me, I’ve learned the hard way). These simple pantry staples come together to create something truly special:
- 1 cup unsalted butter, softened (that means leave it out for 30-60 minutes!)
- 1 1/2 cups granulated sugar
- 2 large eggs (room temperature blends better)
- 1 teaspoon vanilla extract (the real stuff, please!)
- 1/2 teaspoon peppermint extract (or 3/4 tsp if you love extra minty flavor)
- 3 cups all-purpose flour (spoon & level method for accuracy)
- 1 1/2 teaspoons baking powder
- 1/2 teaspoon salt
- 1/2 cup crushed peppermint candies or candy canes (about 12 standard candies)
See? Nothing fancy – just good old-fashioned ingredients with a festive twist. Now let’s make some cookie bar magic!
Equipment You’ll Need
Don’t worry – you won’t need any fancy gadgets for these peppermint sugar cookie bars! Just grab these basics from your kitchen:
- 9×13-inch baking pan (my trusty metal one works perfectly)
- Mixing bowls (one large, one medium)
- Electric mixer (handheld or stand mixer both work great)
- Spatula (for scraping every last bit of dough)
- Measuring cups and spoons
That’s it! Now let’s get baking – those peppermint bars aren’t going to make themselves!
How to Make Peppermint Sugar Cookie Bars
Alright, let’s dive into the fun part – making these festive treats! I’ve made these peppermint sugar cookie bars more times than I can count, and I’m sharing all my little secrets to get them perfect every time. Follow these steps, and you’ll have a pan of minty goodness ready before you know it!
Step 1: Preheat and Prepare
First things first – crank that oven to 350°F (175°C). While it’s heating up, grab your 9×13-inch pan and grease it really well. I like to use butter or nonstick spray, making sure to get all the corners. Nothing’s worse than beautiful cookie bars that stick!
Step 2: Cream Butter and Sugar
Now for the magic! In your mixing bowl, beat that softened butter (not melted! – I’ve made that mistake before) with the sugar for a good 2-3 minutes. You’ll know it’s ready when it turns pale and fluffy – this creates those perfect air pockets that make your bars light yet chewy.
Step 3: Add Eggs and Extracts
Next, beat in the eggs one at a time, then add both extracts. That peppermint smell will hit your nose immediately – heavenly! Pro tip: scrape down the bowl sides halfway through to make sure everything mixes evenly.
Step 4: Mix Dry Ingredients
In a separate bowl, whisk together flour, baking powder, and salt. Gradually add this to your butter mixture on low speed until just combined. Don’t overmix! A few flour streaks are okay – they’ll disappear when you add the peppermint.
Step 5: Fold in Peppermint Candies
The fun part! Use a spatula to gently fold in those crushed candies. I like to reserve a tablespoon to sprinkle on top before baking for extra festive flair. The dough will be thick – that’s exactly what we want!
Step 6: Bake and Cool
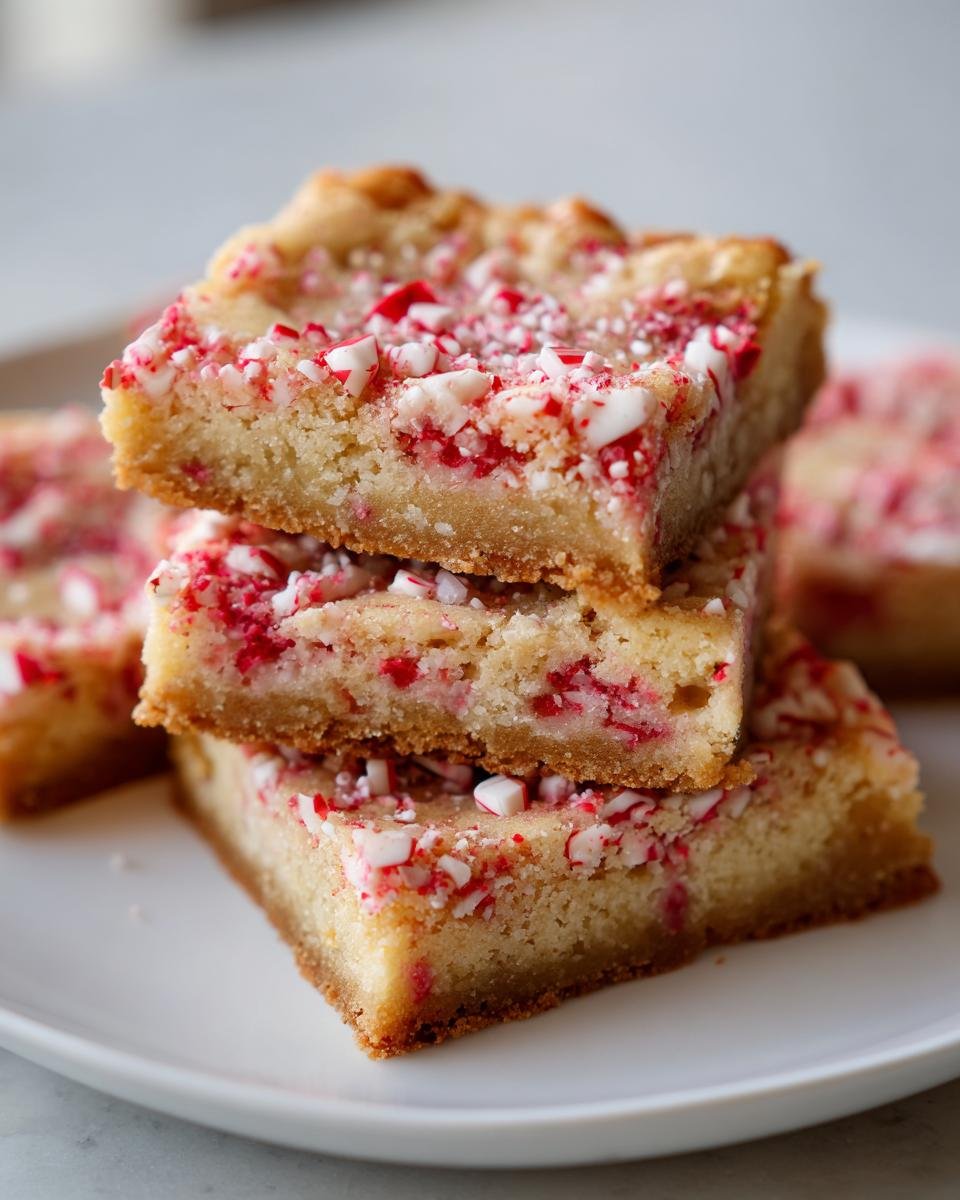
Spread your dough evenly in the pan (wet fingers help smooth stubborn spots). Bake for 20-25 minutes until the edges are golden but the center still looks slightly soft. Resist cutting right away! Let them cool completely – about an hour – for clean cuts.
Tips for Perfect Peppermint Sugar Cookie Bars
After making these bars for years (and yes, making plenty of mistakes along the way!), I’ve learned some tricks that’ll guarantee bakery-worthy results every time:
- Temperature matters: That softened butter really does make a difference – it should leave a slight indent when pressed but not be greasy. Cold eggs can make your batter separate, so take them out when you take out the butter.
- Mint control: Love that cool peppermint kick? Add an extra 1/4 teaspoon extract – but don’t go overboard or it’ll taste like toothpaste!
- Crushing candies: Place them in a ziplock bag and use a rolling pin – so much easier than trying to chop them! For pretty specks, aim for pea-sized pieces.
- Clean cuts: Use a sharp knife and wipe it between slices with a damp cloth. The bars firm up as they cool, so patience pays off!
The science behind baking is fascinating, and understanding how ingredients interact can help achieve the perfect texture.
Remember, even “imperfect” batches still taste amazing – that’s the magic of these bars!
Variations for Peppermint Sugar Cookie Bars
One of my favorite things about this recipe is how easily you can mix it up for different occasions! Over the years, I’ve played around with all sorts of fun twists – here are my favorite ways to switch things up when I’m feeling creative:
- Candy cane magic: Swap the peppermint candies for crushed candy canes – the red stripes make them extra festive for Christmas parties!
- Chocolate drizzle: Melt some white chocolate and zigzag it over the cooled bars – the creamy contrast with the mint is heavenly.
- Nutty twist: Replace half the peppermint extract with almond extract and add 1/2 cup chopped toasted almonds – so good with coffee!
- Chocolate chip version: Fold in 1/2 cup mini chocolate chips along with the peppermint for a mint-chocolate combo.
- Gluten-free option: Use a 1:1 gluten-free flour blend – my sister swears it works perfectly.
The possibilities are endless – that’s what makes these bars so fun to bake year after year!
Serving Suggestions for Peppermint Sugar Cookie Bars
These peppermint sugar cookie bars shine brightest when served with a steaming mug of hot cocoa – the mint and chocolate combo is pure holiday magic! I love arranging them on a festive platter with other cookies for holiday parties, or packing them in cute boxes tied with ribbon for edible gifts. They’re perfect for dessert after a cozy winter meal, or honestly? I won’t judge if you sneak one with your morning coffee!
Storage and Reheating Instructions
These peppermint sugar cookie bars keep beautifully in an airtight container at room temperature for up to 5 days (if they last that long!). For an extra fresh taste, pop one in the microwave for 5-10 seconds – just enough to make it slightly warm and extra soft. The minty aroma will fill your kitchen all over again!
Nutritional Information
Now, I’m no nutritionist, but here’s what you should know about these peppermint sugar cookie bars – they’re definitely a treat! The nutritional values will vary depending on your exact ingredients and brands (especially those peppermint candies). While I don’t track every calorie when baking for the holidays, I can tell you these bars pack plenty of buttery, sugary goodness with that delightful minty kick!
FAQs About Peppermint Sugar Cookie Bars
Got questions about these festive treats? I’ve got answers! Here are the most common things people ask me about making peppermint sugar cookie bars:
Can I use candy canes instead of peppermint candies?
Absolutely! Crushed candy canes work just as well and add those pretty red streaks. Just make sure to crush them into small pieces so they distribute evenly in the dough.
How do I store these bars?
Keep them in an airtight container at room temperature for up to 5 days. If you want to keep them longer, you can freeze them for up to 3 months – just thaw before serving!
Can I make these gluten-free?
Yes! Use a 1:1 gluten-free flour blend, and they’ll turn out just as delicious. My sister makes them this way every year!
Why are my bars too crumbly?
This usually happens if they’re overbaked. Next time, check them at 20 minutes – they should be just golden around the edges but still slightly soft in the center.
Any other questions? Just ask – I’m here to help you bake the perfect peppermint sugar cookie bars!
Share Your Experience
Did you make these peppermint sugar cookie bars? I’d love to hear how they turned out! Leave a comment below to share your baking adventure, snap a photo for Instagram (tag me!), or give the recipe a rating if you loved it. Seeing your creations makes my holiday season even brighter!
Print48-Hour Peppermint Sugar Cookie Bars That Melt in Your Mouth

Soft and chewy peppermint sugar cookie bars with a festive twist. Perfect for holiday baking.
- Prep Time: 15 mins
- Cook Time: 25 mins
- Total Time: 40 mins
- Yield: 24 bars 1x
- Category: Dessert
- Method: Baking
- Cuisine: American
- Diet: Vegetarian
Ingredients
- 1 cup unsalted butter, softened
- 1 1/2 cups granulated sugar
- 2 large eggs
- 1 tsp vanilla extract
- 1/2 tsp peppermint extract
- 3 cups all-purpose flour
- 1 1/2 tsp baking powder
- 1/2 tsp salt
- 1/2 cup crushed peppermint candies
Instructions
- Preheat oven to 350°F. Grease a 9×13-inch baking pan.
- Cream butter and sugar until light and fluffy.
- Beat in eggs, vanilla, and peppermint extract.
- Mix in flour, baking powder, and salt until combined.
- Fold in crushed peppermint candies.
- Spread batter evenly in the prepared pan.
- Bake for 20-25 minutes or until edges are golden.
- Cool completely before cutting into bars.
Notes
- Store in an airtight container for up to 5 days.
- For extra minty flavor, add an additional 1/4 tsp peppermint extract.
- Substitute peppermint candies with candy canes for a festive touch.
Nutrition
- Serving Size: 1 bar
- Calories: 180
- Sugar: 12g
- Sodium: 85mg
- Fat: 8g
- Saturated Fat: 5g
- Unsaturated Fat: 3g
- Trans Fat: 0g
- Carbohydrates: 25g
- Fiber: 0.5g
- Protein: 2g
- Cholesterol: 30mg

