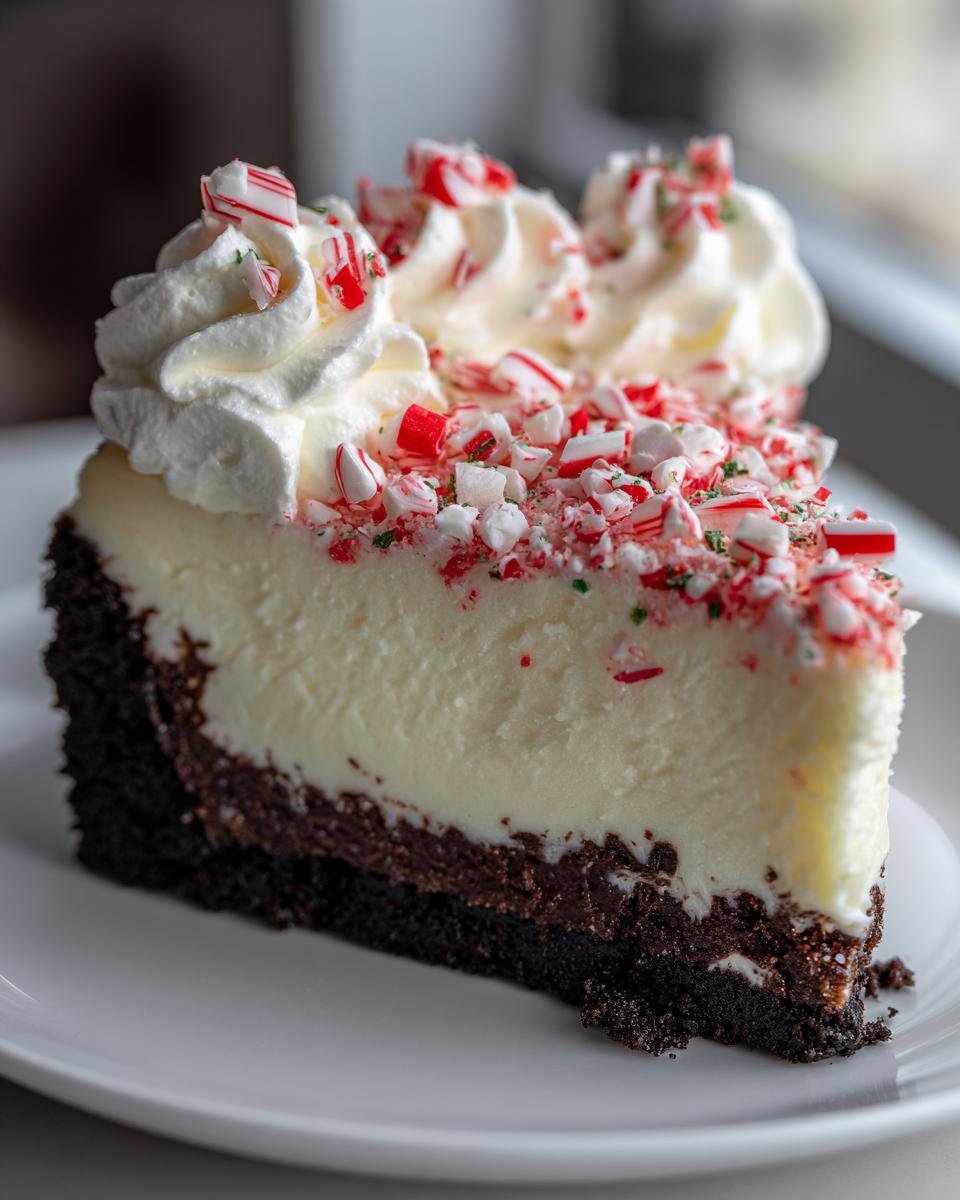
Nothing screams “holiday magic” quite like the first bite of my peppermint cheesecake – creamy, cool, and bursting with festive flavor. I still remember the Christmas Eve when I first made this showstopper dessert, nervously watching as my skeptical uncle took his first forkful… only to immediately ask for seconds! The combination of rich chocolate crust and refreshing peppermint filling has become our family’s must-have winter treat.
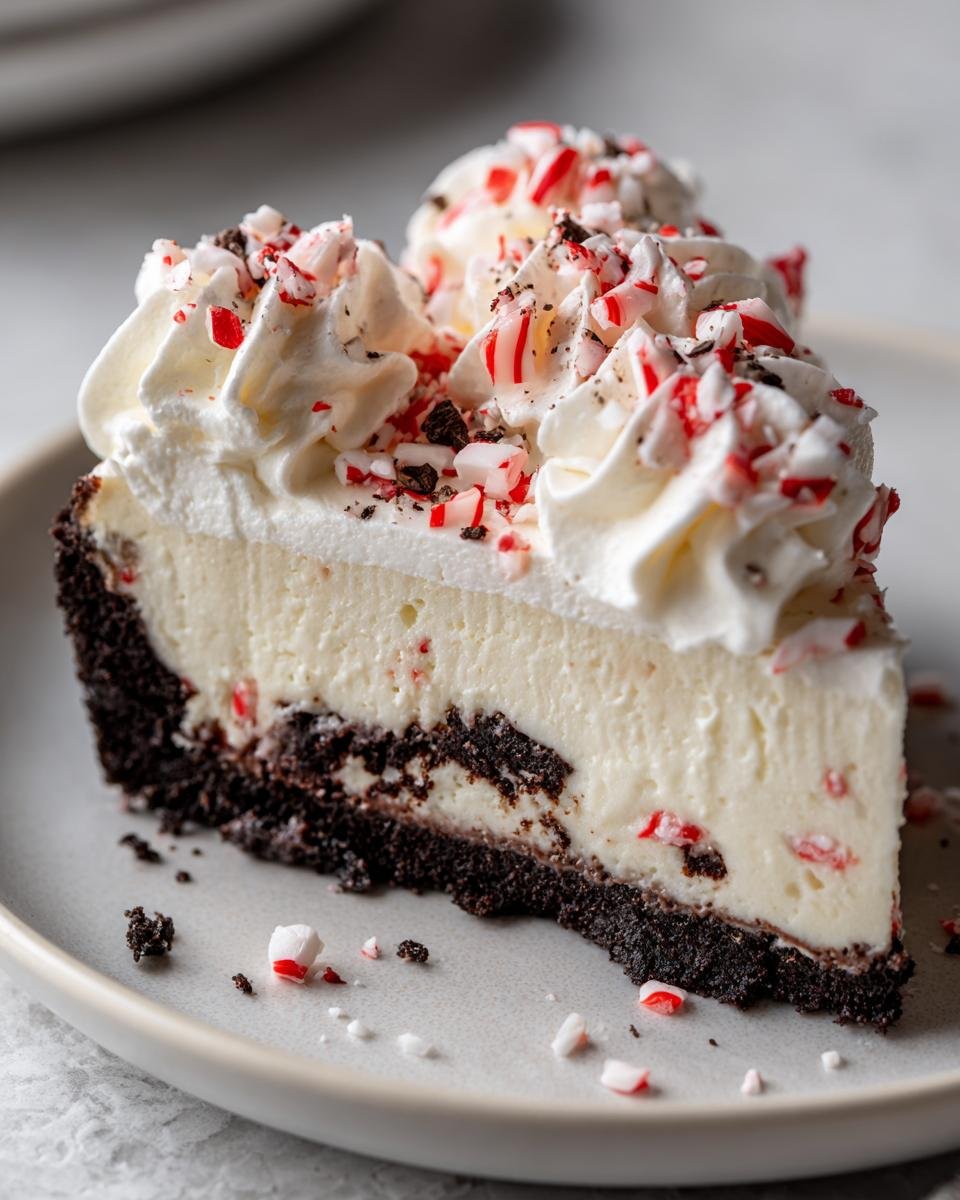
What makes this peppermint cheesecake special? It’s all about balance – the smooth cream cheese base gets just enough peppermint kick without being overwhelming, while those crushed candy cane pieces on top give every slice that perfect holiday crunch. Whether you’re hosting a cookie exchange or just craving something sweet, this dessert delivers all the cozy winter vibes in one glorious bite.
Ingredients for Peppermint Cheesecake
Let’s talk ingredients because, trust me, they make all the difference. You’ll need 2 cups of chocolate cookie crumbs – I like using Oreos (yes, the filling included!) for that rich, chocolaty base. Mix that with 1/4 cup of melted butter to hold it all together. For the filling, grab 24 oz of cream cheese (make sure it’s softened – room temperature is key!) and 1 cup of sugar to sweeten things up. You’ll also need 3 large eggs, 1 tsp of vanilla extract, and 1/2 tsp of peppermint extract for that cool, minty kick. Don’t forget 1/2 cup of crushed peppermint candies for topping, and 1 cup of heavy cream to whip up for the final layer. Simple, right? But oh, so magical!
How to Make Peppermint Cheesecake
Okay, let’s get baking! I promise this peppermint cheesecake is easier than it looks. Just follow these steps, and you’ll have a showstopping dessert that’ll make everyone think you’re a professional pastry chef. The key is taking your time and enjoying the process – plus, your kitchen will smell amazing!
Preparing the Crust
First things first – that chocolatey foundation! Grab your 9-inch springform pan (trust me, the removable sides are lifesavers later). Mix those chocolate cookie crumbs with melted butter until it looks like wet sand. Now press it firmly into the pan – I use the bottom of a glass to get it nice and even. Pop this in the fridge while you make the filling – it helps the crust set up perfectly.
Making the Cheesecake Filling
Here’s where the magic happens. Beat your room-temperature cream cheese (this is SO important – cold cheese makes lumpy filling) with sugar until it’s completely smooth. Scrape the bowl often! Add eggs one at a time, mixing just until combined – overbeating makes cracks. Now the fun part: stir in vanilla and peppermint extract. Start with 1/2 tsp peppermint, then taste (I sometimes add an extra 1/4 tsp if I want more minty punch). The filling should be silky smooth – no lumps!
Baking and Cooling
Pour your gorgeous filling over the chilled crust. Gently tap the pan on the counter to release air bubbles. Bake at 325°F for 45-50 minutes – the edges should be set but the center will still jiggle slightly. Turn off the oven and crack the door for an hour (this prevents cracking!). Then let it cool completely at room temperature before refrigerating for at least 4 hours – patience is key!
Adding the Topping
Final flourish time! Whip that heavy cream until stiff peaks form – I chill my bowl first for best results. Spread it over the chilled cheesecake like a fluffy cloud. Now sprinkle crushed peppermints generously across the top. The candy gives that festive crunch and pop of color. Pro tip: crush extra candies to serve on the side for those who want extra minty goodness!
Tips for Perfect Peppermint Cheesecake
After making this peppermint cheesecake dozens of times (and learning from my fair share of mistakes!), I’ve picked up some foolproof tricks. First – and I can’t stress this enough – room temperature ingredients are non-negotiable. Cold cream cheese equals lumpy filling, and nobody wants that. Take it out at least 2 hours before baking. Second, taste your filling before baking – peppermint extract strengths vary wildly! Start with 1/2 tsp, then add more if needed. Lastly, don’t rush the chilling – that 4 hour minimum makes all the difference for the perfect creamy texture. Oh, and one more thing – if your cheesecake cracks? Just cover it with whipped cream and extra candy. Problem solved!
Variations of Peppermint Cheesecake
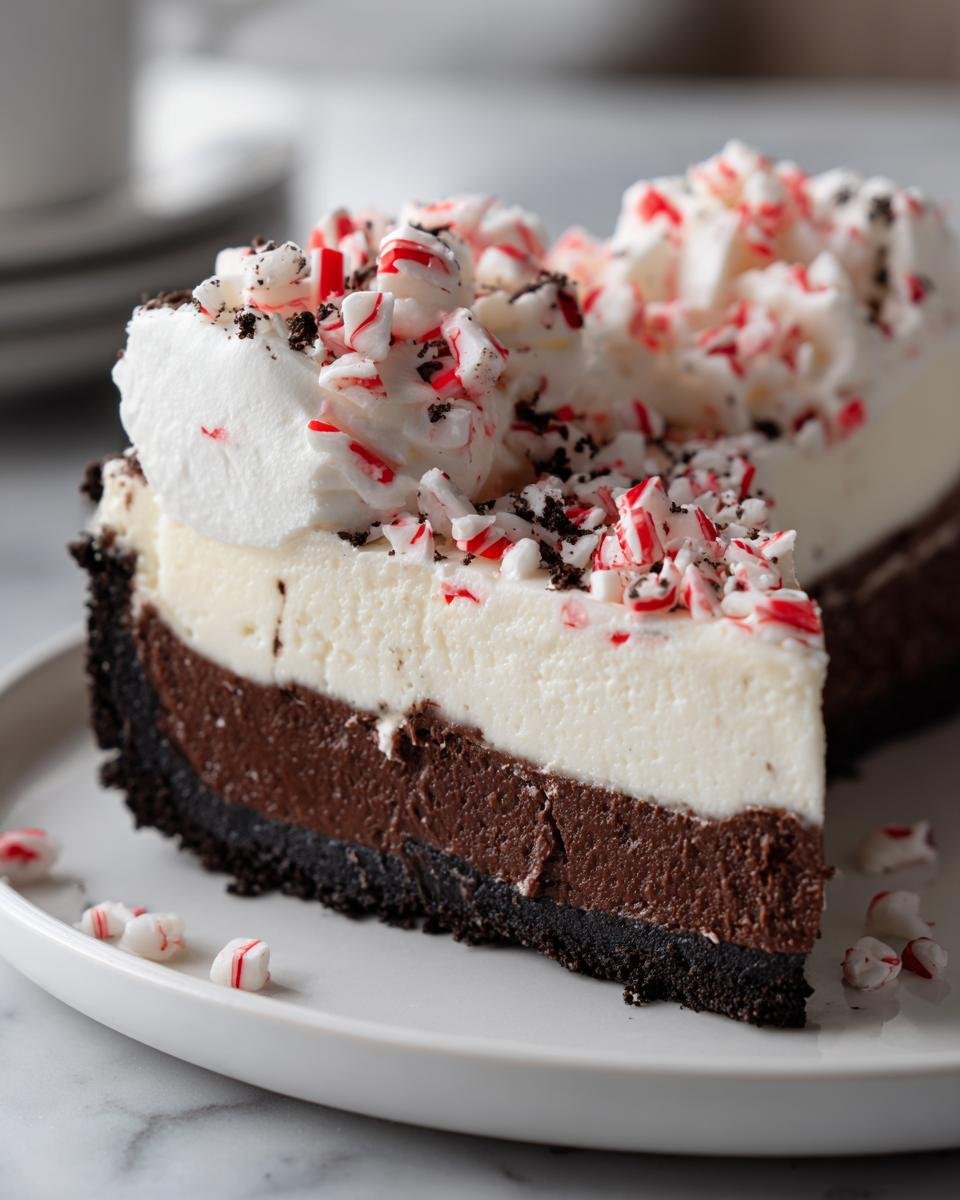
One of my favorite things about this peppermint cheesecake is how easily you can make it your own! For chocolate lovers, try drizzling warm chocolate ganache over the top before adding the whipped cream – the rich fudgey flavor pairs perfectly with the cool mint. If you prefer a lighter crust, swap the chocolate cookies for graham crackers (I’ve even used gingersnaps for a spicy twist!). Feeling extra indulgent? Fold 1/2 cup of melted white chocolate into the filling – it creates this dreamy, creamy texture that’s just heavenly with the peppermint. The possibilities are endless!
Serving Suggestions for Peppermint Cheesecake
Oh, the fun part – serving up this snowy-white beauty! I love pairing slices with steaming mugs of hot cocoa – the chocolate and mint combo is pure winter magic. For grown-up gatherings, try it with strong coffee or even a splash of peppermint schnapps in the whipped cream. A quick drizzle of chocolate syrup makes it extra festive, and a few fresh mint leaves on the plate add that perfect holiday pop of green. Pro tip: serve on chilled dessert plates to keep everything cool and refreshing!
Storage and Reheating Instructions
Here’s the good news – this peppermint cheesecake actually gets better after a day in the fridge! Just cover it tightly with plastic wrap (I press it right against the surface to prevent drying) and it’ll keep beautifully for up to 5 days. Now for the bad news – freezing is a no-go. I learned the hard way that the texture turns grainy after thawing. If you must freeze, skip the whipped cream topping and add it fresh when serving. But honestly? Just invite more friends over – this dessert disappears fast anyway!
Nutritional Information for Peppermint Cheesecake
Just so you know, the nutritional info for this peppermint cheesecake is based on standard ingredients and serving sizes, but it’s always an estimate. Different brands or tweaks to the recipe can change things up a bit. One slice comes in at about 420 calories, with 28g of fat and 30g of sugar. It’s definitely a treat, but hey, holidays are for indulging, right? Enjoy every bite!
PrintIrresistible Peppermint Cheesecake in 5 Easy Steps
A creamy and refreshing peppermint cheesecake with a chocolate crust, perfect for holidays or special occasions.
- Prep Time: 20 minutes
- Cook Time: 50 minutes
- Total Time: 5 hours 10 minutes (includes chilling)
- Yield: 10 servings 1x
- Category: Dessert
- Method: Baking
- Cuisine: American
- Diet: Vegetarian
Ingredients
- 2 cups chocolate cookie crumbs
- 1/4 cup melted butter
- 24 oz cream cheese, softened
- 1 cup sugar
- 3 eggs
- 1 tsp vanilla extract
- 1/2 tsp peppermint extract
- 1/2 cup crushed peppermint candies
- 1 cup heavy cream
Instructions
- Preheat oven to 325°F.
- Mix cookie crumbs with melted butter and press into a springform pan.
- Beat cream cheese and sugar until smooth.
- Add eggs one at a time, then mix in vanilla and peppermint extract.
- Pour filling over crust and bake for 45-50 minutes.
- Let cool, then refrigerate for at least 4 hours.
- Whip heavy cream and spread over cheesecake. Top with crushed peppermint candies.
Notes
- Use room-temperature cream cheese for smoother texture.
- For a stronger peppermint flavor, add an extra 1/4 tsp extract.
- Store leftovers in the refrigerator.
Nutrition
- Serving Size: 1 slice
- Calories: 420
- Sugar: 30g
- Sodium: 280mg
- Fat: 28g
- Saturated Fat: 16g
- Unsaturated Fat: 9g
- Trans Fat: 0g
- Carbohydrates: 38g
- Fiber: 1g
- Protein: 6g
- Cholesterol: 120mg

