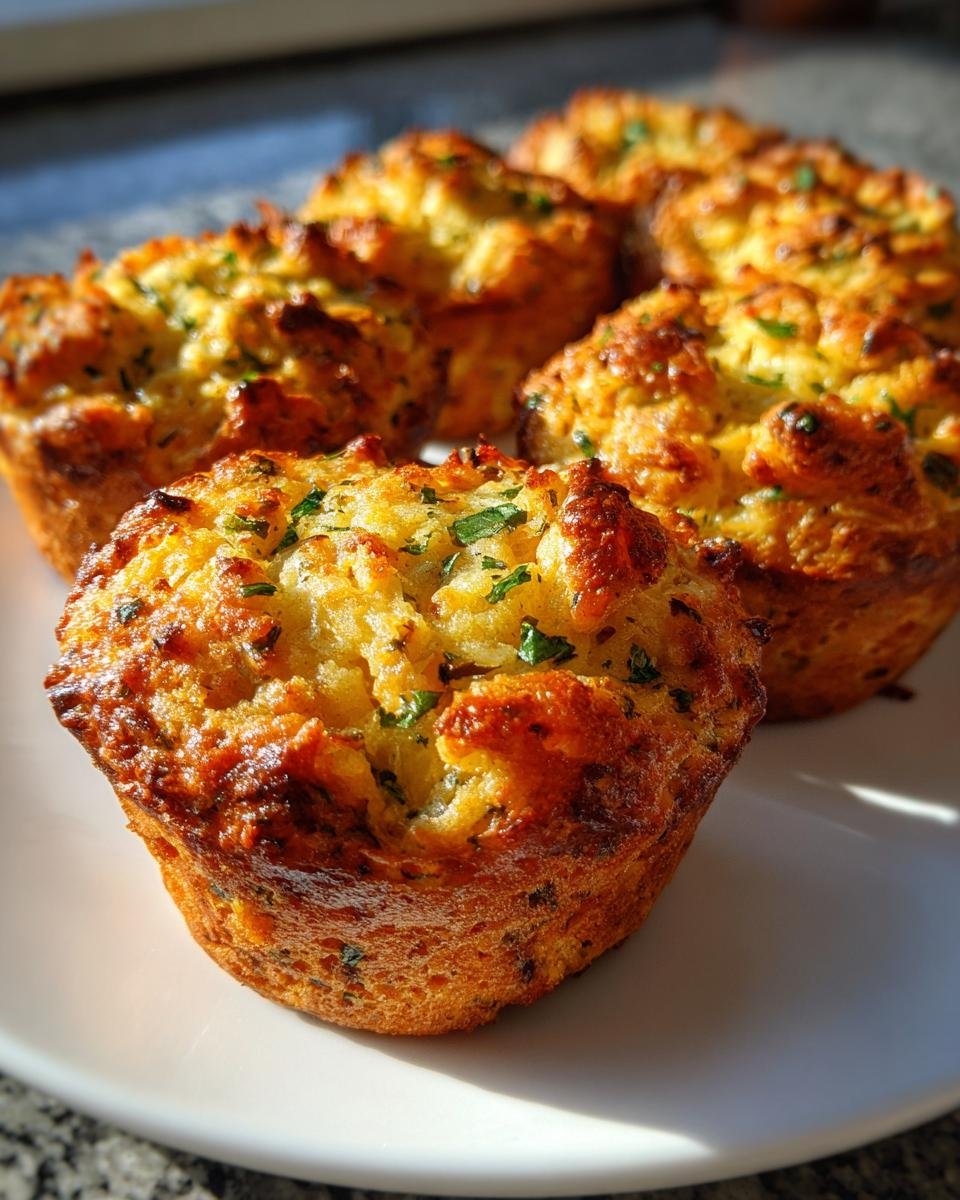
Let me tell you about my secret weapon for holiday meals and weeknight dinners: stuffing muffins. These little savory bites are a game-changer! I first made them one Thanksgiving when I ran out of oven space for a traditional stuffing dish. I thought, “Why not try muffin tins?” And wow, they were a hit. Portable, perfectly portioned, and oh-so-easy to serve, stuffing muffins have become a staple in my kitchen. Whether it’s a cozy family dinner or a potluck with friends, these muffins always disappear fast. Trust me, once you try them, you’ll wonder how you ever lived without them!

Why You’ll Love These Stuffing Muffins
Let me count the ways these little wonders will steal your heart (and probably your appetite too):
- So easy a kid could make them – Seriously, just mix, scoop, and bake. No fancy skills needed!
- Portable perfection – Forget messy serving spoons – these muffins are grab-and-go delicious.
- Your playground of flavors – Add sausage, swap herbs, throw in some cranberries – make them yours!
- Leftover magic – That half-loaf of bread going stale? It’s muffin destiny waiting to happen.
- Crowd-pleasing cuteness – There’s something about mini foods that makes everyone smile (and eat more).
I’m not kidding when I say these might just become your new kitchen obsession. They’re that good.
Ingredients for Stuffing Muffins
Okay, let’s gather our muffin magic makers! Here’s what you’ll need to create these little bites of savory heaven. I’ve learned through trial and error (and a few kitchen disasters) that quality ingredients make all the difference here.
- 2 cups bread crumbs – Day-old bread works best! Tear it up or pulse in a food processor until you get coarse crumbs. Trust me, fresh bread makes soggy muffins – we want texture!
- 1/2 cup melted butter – The good stuff, please! None of that margarine nonsense. This gives our muffins that rich, golden crust.
- 1/2 cup chopped onion – Finely diced is key here. Big chunks will make your muffins fall apart.
- 1/2 cup chopped celery – Same as the onion – small, even pieces for the best texture.
- 1/4 cup chopped parsley – Fresh is best, but dried works in a pinch (use about 1 tablespoon dried).
- 1 egg – Our binder! Room temperature blends better.
- 1 tsp dried sage – The classic stuffing flavor. Rub it between your fingers before adding to wake up the oils.
- 1/2 tsp salt – Adjust to taste, but don’t skip it – brings all the flavors together.
- 1/4 tsp black pepper – Freshly ground adds the best flavor.
- 1 cup chicken or vegetable broth – Low-sodium is my go-to so I can control the salt. Veggie broth keeps it vegetarian-friendly!
See? Nothing fancy, just good, honest ingredients that work together beautifully. Now let’s get mixing!
How to Make Stuffing Muffins
Okay, time for the fun part! Making these stuffing muffins is so simple you’ll laugh. But I’ve got some tricks to make sure they come out perfect every single time. Follow along with me – I’ll walk you through each step like we’re cooking together in my kitchen.
Preheat and Prepare
First things first – fire up that oven! Set it to 375°F (190°C) and let it heat up while you prep everything else. Here’s my little secret: always preheat for at least 15 minutes to make sure it’s nice and even.
Now grab your muffin tin – a standard 12-cup one works perfectly. Give it a good spray with cooking spray or brush with melted butter. Get into all those little crevices! I learned the hard way that skimping here leads to heartbreak when half your muffin tops stick in the pan.
Mix the Ingredients
In a big bowl, toss together your bread crumbs, onion, celery, parsley, sage, salt, and pepper. Use your hands if you want – I love getting in there and feeling the textures mix together!
In another bowl, whisk the egg into your melted butter until it’s all friendly and combined. Pour this over your dry ingredients and mix gently. Now here’s the important part: add your broth slowly, about ¼ cup at a time. You want the mixture moist but not soggy – it should hold together when you squeeze a handful. Too dry? Add a splash more broth. Too wet? A sprinkle more bread crumbs will fix it.
Bake to Perfection
Scoop your mixture into the muffin cups – I use an ice cream scoop for perfect portions. Fill each about halfway – they’ll puff up beautifully as they bake. Pop them in the oven and set your timer for 20 minutes.
At the 20-minute mark, peek in. You’re looking for golden brown tops that make your kitchen smell like Thanksgiving morning. If they need another 5 minutes (some ovens run cooler), give them that time. But don’t overbake – we want slightly crispy edges with a tender middle.
Let them cool in the pan for just 5 minutes – any longer and they might stick. Then run a butter knife around the edges and gently lift them out. That first bite of warm, savory goodness? Pure magic!
Tips for the Best Stuffing Muffins
Want stuffing muffins that’ll make everyone ask for seconds? Here are my tried-and-true tips:
- Use day-old bread – Fresh bread gets too soggy. Stale bread gives the perfect texture.
- Don’t overdo the broth – Add it gradually until the mix is just moist enough to hold together.
- Get creative with flavors – Add cooked sausage, cranberries, or swap sage for thyme. It’s your muffin, your rules!
- Grease the pan well – Nobody likes a muffin that sticks. Trust me on this one.
Follow these tips, and you’ll have stuffing muffin perfection every time!
Ingredient Substitutions and Variations
One of my favorite things about stuffing muffins? How easily you can make them your own! Over the years, I’ve played with this recipe more times than I can count. Here are all the tweaks and swaps that have worked beautifully in my kitchen:
Bread Basics
That 2 cups of bread crumbs doesn’t have to mean plain white bread! I’ve had fantastic results with:
- Gluten-free bread – Works like a charm for those avoiding gluten. Just make sure it’s day-old!
- Cornbread crumbs – Adds a sweet twist that’s amazing with chili or BBQ meals.
- Whole grain or sourdough – For extra texture and flavor depth.
Meat Lovers’ Options
Want to bulk these up? Try mixing in:
- Cooked sausage – Brown some breakfast sausage and fold it in before baking.
- Diced bacon – Because, well… bacon makes everything better.
- Chopped ham – Perfect for using up holiday leftovers.
Vegetable Twists
Don’t limit yourself to just onions and celery! I’ve had great success with:
- Sautéed mushrooms – Adds wonderful umami flavor.
- Dried cranberries or cherries – Sweet bursts that pair beautifully with poultry.
- Grated carrot or zucchini – Sneaky veggie boost that keeps them moist.
Herb and Spice Swaps
That 1 tsp of sage is just a starting point. Try:
- Poultry seasoning blend – About 1 1/2 tsp for a more complex flavor.
- Fresh herbs – Triple the amount if using fresh thyme or rosemary.
- Spice it up – A pinch of cayenne or smoked paprika adds nice warmth.
Dietary Adjustments
Making these for special diets? No problem!
- Vegan version – Use plant butter, flax egg (1 tbsp ground flax + 3 tbsp water), and veggie broth.
- Dairy-free – Any neutral oil can replace the butter, though the flavor changes slightly.
- Lower carb – Try almond flour bread crumbs and reduce the amount slightly.
The beauty of this recipe is how forgiving it is. Once you’ve got the basic method down, feel free to play around! Some of my best versions came from “Hmm, I wonder what would happen if…” moments in the kitchen.
Serving Suggestions for Stuffing Muffins
Okay, so you’ve made these amazing stuffing muffins – now what? Let me tell you, these little guys are like the Swiss Army knife of side dishes. They go with practically everything! Here are my favorite ways to serve them:
- Holiday hero – Pair them with roasted turkey, ham, or chicken. Bonus points if you drizzle a little gravy on top. Trust me, it’s a game-changer.
- Weeknight wonder – Serve alongside grilled chicken or pork chops for an easy, comforting meal. Add a simple green salad, and dinner’s done!
- Brunch buddy – These muffins are perfect with eggs benedict or a frittata. The savory flavor complements breakfast dishes beautifully.
- Soup’s best friend – Serve them warm with a bowl of creamy soup – think chicken noodle, butternut squash, or tomato basil. It’s comfort food heaven.
- Party perfect – Make them mini by using a mini muffin tin and serve as appetizers. Dip them in cranberry sauce or gravy for a festive touch.
Honestly, I’ve even eaten them cold straight from the fridge when no one was looking. Don’t judge me – they’re just that good!
Storing and Reheating Stuffing Muffins
Let’s talk about keeping these little flavor bombs tasting just as amazing as when they first came out of the oven. Because let’s be real – you might not always finish them all in one sitting (though I won’t judge if you do!). Here’s everything I’ve learned about storing and reviving stuffing muffins over the years.
Keeping Them Fresh
First rule of stuffing muffin club: let them cool completely before storing. I learned this the hard way when I once packed warm muffins in a container and ended up with a soggy mess. Now I always give them at least 30 minutes on a wire rack.
For short-term storage (2-3 days), pop them in an airtight container at room temperature. If your kitchen runs warm like mine does in summer, tuck them in the fridge instead. They’ll keep for up to 5 days chilled.
Freezer Magic
Want to enjoy these months later? Freeze them! Here’s my foolproof method:
- Wrap each cooled muffin individually in plastic wrap
- Pop them in a freezer bag, squeezing out all the air
- Label with the date (they’re good for 3 months)
I always keep a stash in my freezer for last-minute dinners. It’s like having a secret weapon ready to go!
Reheating Like a Pro
Now for the important part – bringing them back to life. My favorite methods:
- Oven method: 350°F for 10-12 minutes (15 if frozen). This keeps them crispy on the outside and fluffy inside.
- Air fryer: 325°F for 5 minutes – perfect when you’re in a hurry!
- Microwave: 15-20 seconds per muffin if you must, but they’ll be softer.
Pro tip: If they seem a bit dry after reheating, brush with melted butter or spritz with broth before warming. It’s like giving them a little spa treatment!
One last thing – never refreeze thawed muffins. The texture just isn’t the same. But honestly, they rarely last long enough for that to be an issue in my house!
Stuffing Muffins Nutrition Information
Now, I’m no nutritionist, but I know you might be curious about what’s in these tasty little muffins. Here’s the deal – these are comfort food, pure and simple. They’re not health food, but they’re made with real ingredients you can feel good about.
Each muffin (assuming you make about 12 from this recipe) comes out to roughly:
- 150 calories
- 8g fat (mostly from that delicious butter!)
- 16g carbs
- 3g protein
Remember: Nutritional values are estimates and vary based on ingredients used. If you’re watching specific dietary needs, you can always tweak the recipe – use less butter, swap in whole grain bread, or load up on extra veggies. But sometimes, especially during the holidays, it’s okay to enjoy food just because it tastes amazing!
Common Questions About Stuffing Muffins
Over the years, I’ve gotten so many questions about these stuffing muffins – and I love sharing what I’ve learned through all my kitchen experiments! Here are the answers to the questions people ask me most often:
Can I freeze stuffing muffins?
Absolutely! These freeze like a dream. Just wrap each cooled muffin tightly in plastic wrap, then pop them in a freezer bag. They’ll keep for up to 3 months. When you’re ready to enjoy, reheat them straight from frozen in a 350°F oven for about 15 minutes. They’ll taste almost as good as fresh!
How do I make vegan stuffing muffins?
It’s easier than you think! Swap the butter for plant-based butter or olive oil, use a flax egg (1 tbsp ground flax + 3 tbsp water), and choose vegetable broth. I’ve made them this way for my vegan friends, and they couldn’t tell the difference!
Why did my muffins turn out dry?
Ah, this usually means either too much bread or not enough broth. Next time, add the broth slowly until the mixture holds together when you squeeze it. Also, don’t overbake – pull them out as soon as they’re golden brown. And here’s my secret: brush the tops with melted butter right when they come out of the oven.
Can I make these ahead of time?
You bet! I often make them the day before a big meal. Just let them cool completely, store in an airtight container, then reheat for 10 minutes in a 350°F oven before serving. They might actually taste better because the flavors have more time to mingle!
What’s the best way to get them out of the pan without sticking?
Oh, I learned this lesson the hard way! First, make sure your muffin tin is well-greased (I use butter or cooking spray). Let the muffins cool in the pan for just 5 minutes – any longer and they’ll start to stick. Then run a butter knife around the edges before gently lifting them out. If they’re really stubborn, a few minutes in the freezer can help loosen them.
Got more questions? Ask away in the comments – I love helping people make these muffins turn out perfectly!
Alright, my fellow muffin enthusiasts – it’s time to put all this delicious knowledge to work! I can’t wait for you to try these stuffing muffins and make them your own. Whether you stick to the classic recipe or go wild with your own creative twists (bacon and cheddar? Yes please!), I know they’ll become a new favorite in your kitchen just like they are in mine.
When you make them, do me a favor – snap a photo and tell me about your version in the comments below. Did you add something unexpected? Discover a brilliant shortcut? Have a hilarious kitchen mishap? (We’ve all been there!) I love hearing how these recipes come to life in other people’s homes. Your tips and tricks might just inspire someone else’s next batch!
Now go forth and bake – your perfect stuffing muffins await!
PrintIrresistible Stuffing Muffins for 12 Perfect Bites

A simple recipe for savory stuffing muffins, perfect as a side dish or snack.
- Prep Time: 15 minutes
- Cook Time: 25 minutes
- Total Time: 40 minutes
- Yield: 12 muffins 1x
- Category: Side Dish
- Method: Baking
- Cuisine: American
- Diet: Vegetarian
Ingredients
- 2 cups bread crumbs
- 1/2 cup melted butter
- 1/2 cup chopped onion
- 1/2 cup chopped celery
- 1/4 cup chopped parsley
- 1 egg
- 1 tsp dried sage
- 1/2 tsp salt
- 1/4 tsp black pepper
- 1 cup chicken or vegetable broth
Instructions
- Preheat oven to 375°F (190°C).
- Mix bread crumbs, melted butter, onion, celery, parsley, egg, sage, salt, and pepper in a bowl.
- Gradually add broth until the mixture is moist but not soggy.
- Spoon the mixture into a greased muffin tin, filling each cup halfway.
- Bake for 20-25 minutes or until golden brown.
- Let cool for 5 minutes before removing from the tin.
Notes
- Use day-old bread for better texture.
- Add cooked sausage or mushrooms for extra flavor.
- Store leftovers in an airtight container for up to 3 days.
Nutrition
- Serving Size: 1 muffin
- Calories: 150
- Sugar: 1g
- Sodium: 250mg
- Fat: 8g
- Saturated Fat: 5g
- Unsaturated Fat: 2g
- Trans Fat: 0g
- Carbohydrates: 16g
- Fiber: 1g
- Protein: 3g
- Cholesterol: 30mg

